IT IS DONE. I will now smile beneficently at Harrison Ford and crumble into dust. Actually, more realistically, I’ll spill tea on myself and then weep salty tears, but my QUILTED JACKET IS FINALLY FINISHED.


Thank you everyone for humoring me on this journey – I’ve spent so many hours exclusively on this one piece over the past month and a half, I think I’d pop if I couldn’t talk about it! This is the final stage, quilting + construction.
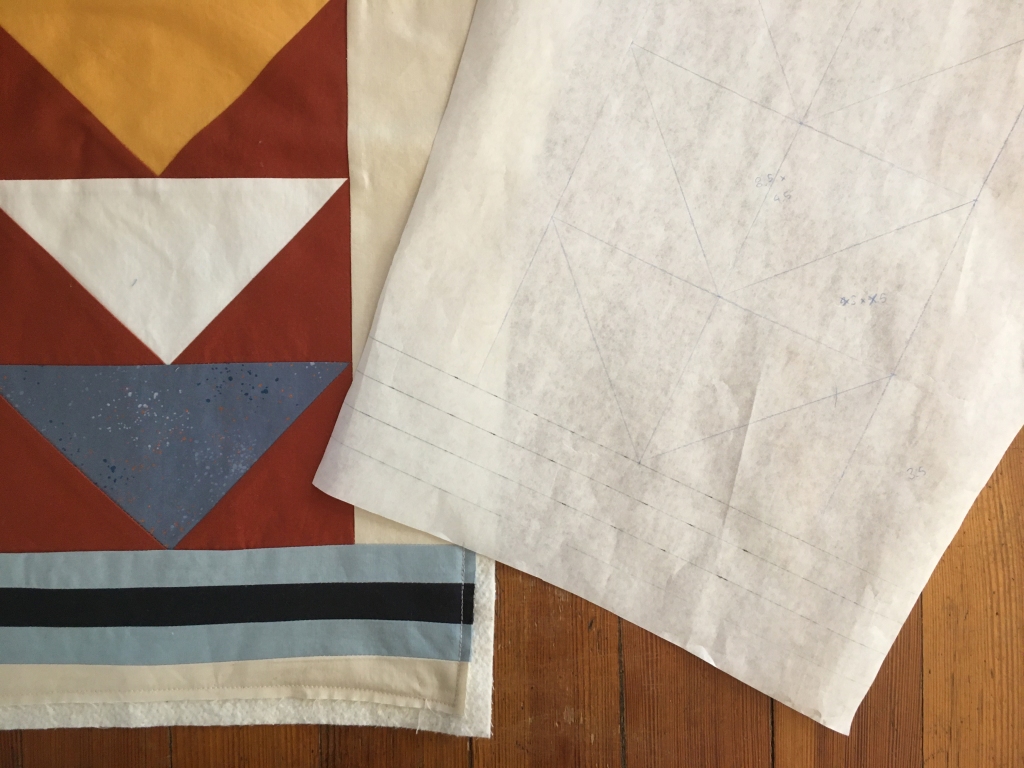
First, quilting! As I mentioned last time, I was worried about the stress of hand quilting, but I made two significant discoveries: 1., I didn’t like the look of machine quilting on this. Commenter Elizabeth suggested checking if my machine could mimic hand stitching. Brilliant idea; sadly it doesn’t have that functionality, and the one-thread stitching looked kind of wimpy, while the idea of double-stitching all those lines (what if one wobbled!!) also made me want to cry salty tears (this post co-hosted by salty tears). Still, I machine quilted the whole back panel before jumping ship. Luckily I then discovered:
2., I had been hand quilting wrong. Not horribly wrong, but I had been working on my lap instead of a table. It was much more comfortable and sustainable at a table! I usually worked in 15 minutes – 1 hour increments, which was a little challenging because it turns out hand quilting is pretty hypnotic and more-ish (especially with TV on). There is now a little flocked pattern where I gouged our soft pine table with the needle over and over, so maybe throw down a magazine or something first if you’re trying this on an Ikea Ingo.


Some of my knots are definitely secured better than others. I confidently expect having to re-do some lines as they work themselves loose, but I have plenty of extra thread. Also, only a small proportion of my stitches actually show on the backing, so I guess despite the table scarification I wasn’t sticking the needle through enough. That said, I’m super happy with the final look! It’s wrinkly and uneven but it plays so much more nicely with my imprecise piecing than the machine stitches. And the doubled thread is punchier.
Also, I decided to keep my second belt! Redemption!!


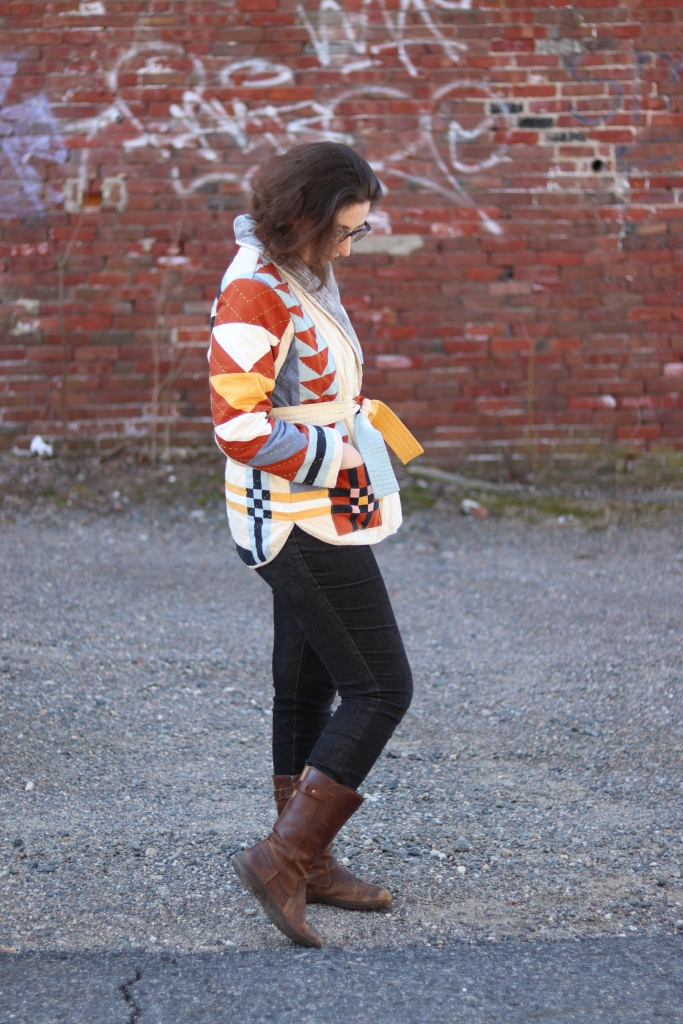

You know people who are like “Oh I’m much more comfortable in stilettos, something something arches”? I’ve never really felt in my bones how that could be true. However, I’m ready to believe now that I’ve melded with my thimble. At first it felt ungainly, but I got to the point where I forgot I was wearing it and only noticed when I went to do something else and felt it clack against the oven handle or a doorknob. I nabbed one at a local swap (well over a year ago now) and it’s just been sitting. Why was I ever hand-sewing without it?!
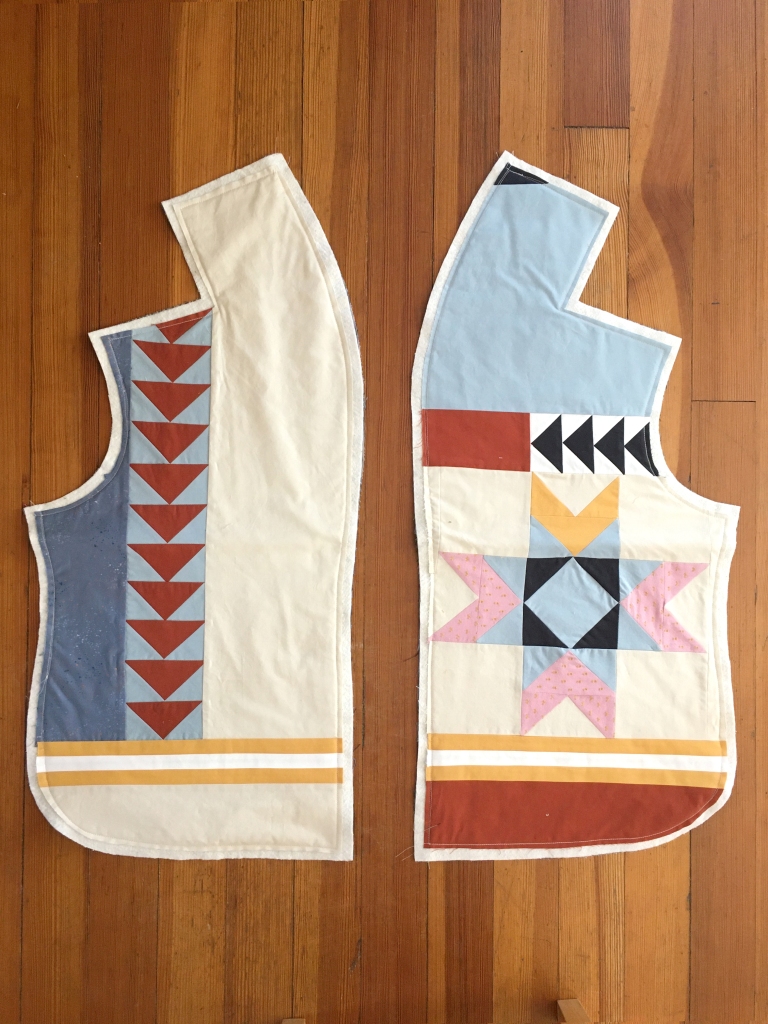
After the quilting, the jacket was practically done (which is different than actually done, as it turns out). Still, I let the pieces sit for a while as I thought about how to handle the shawl collar/back neck junction, and eventually I decided to figure it out on the day. It’s obvious in retrospect but without a facing the bound center-collar seam shows at the back! I had a belated “duuuh” moment, but in a garment with so much visible binding, I wasn’t going to quibble about a little peek at the neck.


I couldn’t figure out how to bind the shoulder and neck seams so I just shoved them under a yoke-ish facing – it’s machine sewn along the back neck, and hand sewn along the shoulders and bottom hem. I had to clip into the corners of the front panels and clip away the corners of the back panels to fold them down but everything is nice and tucked away inside.

I also had to ease the back shoulder seam to match the shorter front shoulder seam but I’m not sure if this is a pattern feature or a me-adding-a-shawl-collar bug.
I forgot to show you the pockets last time! They have a batting layer and are lined with the background ‘Putty’ cotton. My only serging is inside these pockets – the top edge is sewn to the lining right-sides-together, then flipped and understitched, but the other three sides got the zoop. These are indeed machine-sewn in place, but there’s a non-zero chance I’ll go back and sew them invisibly instead. We’ll seeee.


I made oodles of bias tape that was a little skinny so I bound seams separately as much as possible, which led to a slight sequencing issue at the side seams. Ultimately I sewed each side seam from the underarm to an inch above the pattern notch (so on my version, to the top yellow horizontal stripe), bound everything, and then sewed the rest of the side seam, including sewing over the finished binding. I deeply covet the squared-off binding finish used by Studio Quirk used on her drop-dead-beautiful Tamarack, but I couldn’t work it out (and oddly I can’t leave a comment on her blog to ask, I always get an error message). I sewed one edge of the bias tape by machine, and the other by hand. This involved further television.

I had enough binding fabric left to cut two extra-wide strips to go around the armscye seam allowances – 2” wide, as opposed to the 1.25” wide I used elsewhere, which had no chance of covering all the layers there – and then – I was done?!

A mere 48 or so hours of sewing later. I could have cried salty tears – twist – OF JOY!! This is the only thing I worked on in February and part of March. I think it might have been worth it. I learned a ton and I really enjoyed myself, and the time was going to pass whether or not I used it. I can see errors in the quilting, the piecing, wrinkles in the construction, and why why why did I not use neon green binding, but I really don’t care. I intended this as a warm stylish house jacket but I am definitely going to take this show on the road. Jacket, prepare to get worn everywhere!
Also, I’m not sure if you can tell, but I’m slightly favoring one arm – I got my first vaccine shot! No side effects except for a sore shoulder. I’ll be fully vaccinated in mid-April!

Thanks for reading!
—
Pattern: Grainline Tamarack
Pattern cost: NA
Size: 12, with added shawl collar
Supplies: .5 yards binding, 2.5 yards backing, 2 yards batting, 5 1/3 yards various cottons, Gather Here, $108.49; thread, Sewfisticated and Michaels, $5.39
Total time: 49 hours
Total cost: $113.88